Skipping a thorough plumbing inspection checklist before hydrojetting could cost you thousands in pipe damage repair. While hydrojetting effectively clears stubborn clogs, it applies extreme water pressure that not every plumbing system can handle.
Many property owners discover this the hard way when pipes crack, joints fail, or existing damage worsens after a hydrojetting service. Before approving this powerful cleaning method, professional plumbers must evaluate 13 critical factors to ensure your pipes can withstand the pressure. These assessments range from video inspection of sewer lines to verification of pipe material and structural integrity.
This comprehensive guide walks you through each essential inspection point, helping you understand what professionals look for and why it matters. By ensuring these checks are completed properly, you can confidently approve hydrojetting when appropriate or explore safer alternatives when your plumbing system has vulnerabilities.
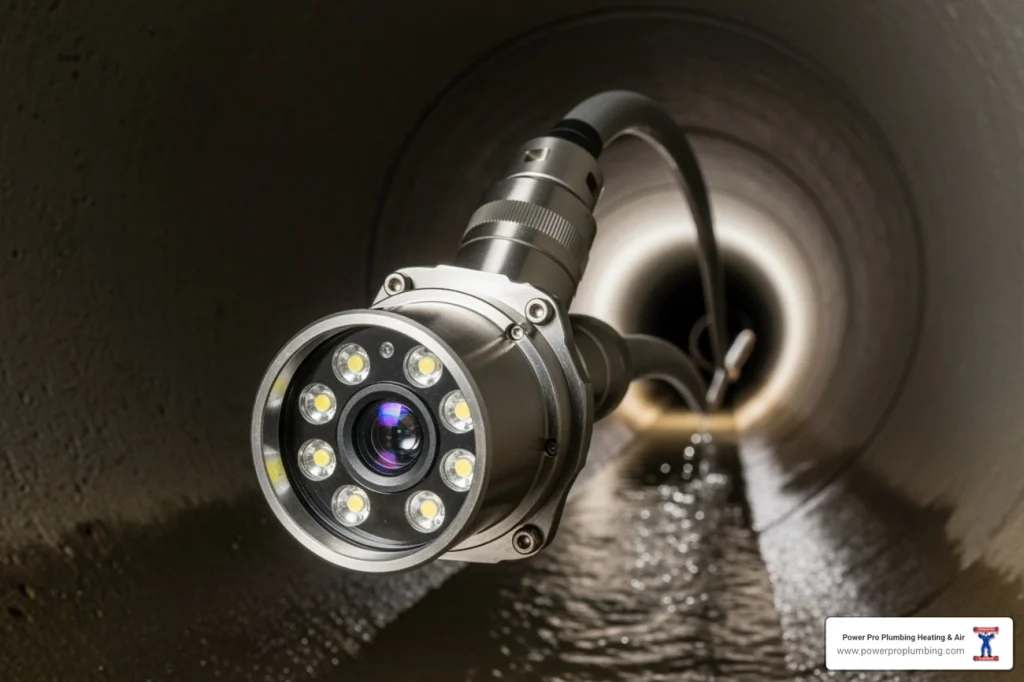
Video Inspection of Sewer Lines

Image Source: WinCan
Video camera inspections represent the first crucial step in any plumbing inspection checklist before hydrojetting. This technology has eliminated the need for disruptive excavation that once dominated sewer line diagnostics.
Video Inspection of Sewer Lines purpose
Camera inspections provide real-time assessment of sewer line integrity without property disruption. This non-invasive technique identifies problems before they escalate into costly repairs, saving homeowners thousands of dollars compared to the relatively modest inspection cost of $100-$250 [1]. Furthermore, these inspections deliver critical information for negotiating power during real estate transactions [2].
Video Inspection of Sewer Lines tools
The inspection equipment includes a high-resolution, waterproof camera attached to a flexible rod or snake. This specialized device is inserted through the main cleanout or roof vent [2]. The camera transmits live footage to a monitor where technicians analyze pipe conditions. Modern systems feature built-in LED lighting to illuminate dark pipe interiors and location-tracking capabilities to map the camera’s path accurately [3].
Video Inspection of Sewer Lines common findings
Common issues revealed during inspections include:
- Tree root intrusion through hairline cracks or unsealed joints
- Structural damage from age, soil movement, or external pressure
- Pipe misalignment creating debris collection points
- Internal corrosion in older cast iron pipes
- Pipe bellies (sagged sections) preventing proper drainage
- Foreign debris from previous renovations
- Grease buildup restricting water flow
Consequently, these detailed visual assessments provide the foundation for determining if pipes can safely withstand hydrojetting pressure.
Pipe Material and Structural Integrity Check

Image Source: Supreme Steel Pipe Corporation
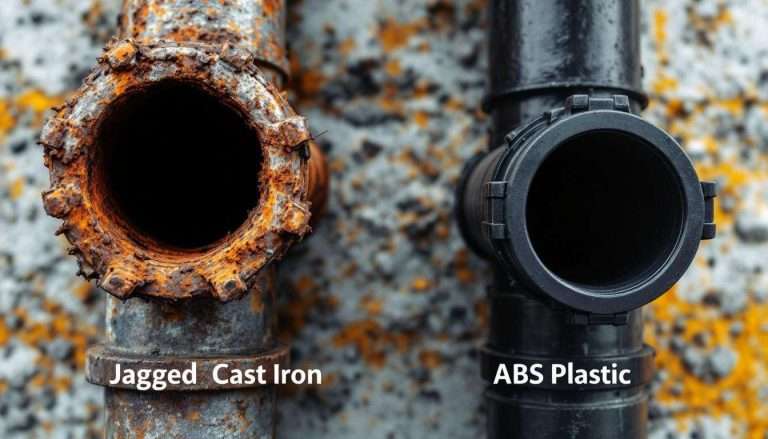
Evaluating pipe material and structural condition stands as a fundamental component on any plumbing inspection checklist. Thorough assessment prevents costly disasters when high-pressure water meets vulnerable pipes.
Pipe Material and Structural Integrity Check importance
The significance of material assessment cannot be overstated since hydro jetting can damage certain pipe types. For instance, hydro jetting is generally safe for PVC, ABS, and copper pipes but presents significant risks to clay, cast iron, and Orangeburg pipes [4]. Additionally, pre-jetting inspections identify weak spots and hidden cracks that might rupture under pressure, avoiding catastrophic failures that could flood finished spaces or cause environmental damage [4].
Pipe Material and Structural Integrity Check methods
Professional assessment techniques include:
- Video inspection: Confirms material type and locates vulnerable sections
- Ultrasonic testing: Measures wall thickness and detects corrosion
- Hydrostatic pressure tests: Evaluate pipe strength under controlled conditions
- Direct assessment: Combines visual examination with coating surveys
These methods allow technicians to calibrate PSI settings and nozzle types appropriately, ensuring safety throughout the process [4].
Pipe Material and Structural Integrity Check red flags
Several warning signs indicate pipes may not withstand hydrojetting:
- Polybutylene pipes (used 1978-1995) prone to sudden failure [5]
- Galvanized steel pipes with internal corrosion (pre-1960 homes) [5]
- Visible corrosion, joint leaks, or rust on exterior sections [6]
- Slow drainage indicating partial collapse [7]
- Discolored water suggesting pipe wall thinning [7]
Assessment of Pipe Diameter and Flow Capacity

Image Source: Zhengzhou Guangyuan Cleaning Equipment Co., Ltd.
Precise measurement of pipe diameter and flow capacity forms a crucial element of any plumbing inspection checklist prior to hydrojetting. The relationship between pipe size and water pressure directly determines whether pipes can safely withstand the intense cleaning method.
Assessment of Pipe Diameter and Flow Capacity tools
Professionals rely on specialized equipment to accurately assess pipes:
- Pipe Flow Expert Software for modeling complex pipe systems and calculating flow rates [8]
- Digital calipers and gages for precise diameter measurements
- Flow rate calculators that determine velocity based on pipe dimensions
- Camera equipment that visually confirms interior pipe dimensions
Assessment of Pipe Diameter and Flow Capacity benchmarks
Standard flow capacity benchmarks vary significantly by pipe size:
- 4-inch pipes: approximately 240 GPM at low pressure [9]
- 3-inch pipes: approximately 140 GPM at low pressure [9]
- 2-inch pipes: approximately 55 GPM at low pressure [9]
Velocity must not exceed 8 feet per second in residential pipes to prevent erosion, noise, and pressure drops [10]. Moreover, each pipe material has distinct flow thresholds—steel pipes of 3-inch diameter safely handle 130 GPM at 5.6 feet per second [11].
Assessment of Pipe Diameter and Flow Capacity impact on hydro jetting
Pipe diameter directly dictates appropriate jetting pressure settings:
- 4-inch pipes typically require only 2,000 PSI to effectively remove debris [12]
- 8-inch pipes often need 3,000 PSI for the same cleaning effectiveness [12]
- 12-inch pipes may demand 4,000 PSI to properly scour pipe walls [12]
Specifically, using excessive pressure (such as 5,000 PSI) in smaller pipes risks damaging clay tile lines or separating cast iron joints [12]. After successful hydrojetting, pipes regain “self-cleaning” velocity during everyday use, as the restored smooth interior allows faster water flow with less friction [13].
Evaluation of Previous Repairs or Patching
Image Source: NW Sewer
Previous repair work in plumbing systems requires careful examination before approving hydrojetting procedures. This critical component of the plumbing inspection checklist helps identify vulnerabilities that could lead to catastrophic failures.
Evaluation of Previous Repairs or Patching indicators
Several signs indicate the need for thorough repair evaluation:
- Frequent leaks in the same pipe section often signal failing plumbing that requires replacement rather than continued patching [14]
- Multiple patch points along a line suggest systemic deterioration
- Discoloration around previous repair areas indicates potential joint weakening
- Inconsistent pipe materials at connection points where repairs occurred
Professional plumbers particularly examine old repairs in clay and galvanized steel pipes, as these materials become increasingly brittle with age [15].
Evaluation of Previous Repairs or Patching documentation
Comprehensive documentation of repair history includes:
- Video inspection footage showing all previous repair locations [16]
- Written reports detailing repair dates and methods used
- Maintenance records revealing frequency of recurring issues
- Photographic evidence of repair quality and current condition
This historical record helps plumbers understand your system’s weak points before applying intense hydrojetting pressure.
Evaluation of Previous Repairs or Patching risks
Despite seemingly successful past repairs, hydrojetting presents unique risks:
- Band-aid solutions eventually fail under high-pressure water [17]
- Poorly executed previous repairs often create new failure points
- Patch joints typically withstand less pressure than original pipe sections [15]
- Hydrojetting may dislodge temporary repairs, resulting in leaks or complete pipe failure
Instead of continuing to apply temporary fixes, addressing underlying pipe deterioration provides long-term solutions.
Inspection for Tree Root Intrusion

Image Source: Hansen’s Plumbing
Tree root intrusion poses a serious threat to sewer systems and must be identified before hydrojetting. This crucial element on the plumbing inspection checklist helps determine whether pipes can safely withstand the high-pressure water treatment.
Inspection for Tree Root Intrusion signs
Early warning signs of root invasion include:
- Slow-draining sinks, showers, and toilets as roots create blockages
- Gurgling noises from drains or toilets indicating trapped air
- Unexpected sewage odors inside or outside your home
- Frequent backups or clogs that return shortly after clearing
- Sudden increases in water bills from pipe leaks
- Unusually green or soggy patches in the yard above sewer lines
- Sinkholes or soft spots forming in your lawn
Identifying these symptoms early can prevent extensive damage to your plumbing system and expensive repairs.
Inspection for Tree Root Intrusion detection methods
Professional plumbers utilize several techniques to confirm root invasion:
- Video camera inspection—the most definitive method—sends a waterproof camera through the pipe, providing real-time footage of root masses and their location
- Acoustic leak detection equipment identifies subtle sounds of water escaping through root-damaged areas
- Thermal imaging cameras detect temperature variations in soil caused by leaking water
- Pressure testing measures water loss and helps pinpoint compromised pipe sections
Inspection for Tree Root Intrusion impact on jetting
Root intrusion critically impacts hydrojetting decisions. First, roots can accelerate pipe degradation, creating weak points that might rupture under jetting pressure. Second, extensive root masses require specific nozzle attachments and pressure settings to effectively remove without damaging pipes. Finally, post-jetting camera inspection becomes essential to verify complete root removal and pipe integrity after the procedure.
Grease and Sludge Buildup Analysis

Image Source: Hydromax Plumbing
Accurate assessment of grease and sludge accumulation represents an essential step in the plumbing inspection checklist before hydrojetting. This evaluation determines both the necessity and safety of the procedure.
Grease and Sludge Buildup Analysis techniques
Professionals employ multiple methods to evaluate buildup severity. Visual inspection via specialized cameras identifies the exact location and extent of accumulation. Technicians also measure pipe capacity reduction by examining flow rates and drainage speed. Indeed, structural defects or obstructions often contribute to debris accumulation, therefore requiring thorough examination. Common culprits include food particles, soap scum, coffee grounds, and cooking oils that solidify in underground pipes—even hot grease cools quickly after reaching cold pipes, adhering to pipe walls.
Grease and Sludge Buildup Analysis severity levels
Buildup severity falls into three classifications:
- Minor buildup: Reduces pipe capacity by less than 25%, typically manageable and may wash away during high water usage
- Moderate buildup: Restricts pipe capacity by 25-50%, requires routine cleaning to prevent progression
- Severe buildup: Reduces pipe capacity by 50% or more, often necessitating immediate intervention
Grease and Sludge Buildup Analysis treatment options
Treatment approaches vary based on severity levels. Although minor accumulation might require simple prevention techniques, moderate buildup often demands professional cleaning. Hydrojetting effectively removes resistant grease deposits, utilizing high-pressure water streams to cut through hardened oils and break down fats without damaging pipes. Meanwhile, enzymatic cleaners offer a less invasive option that uses bacteria to digest accumulated grease. In commercial kitchens, preventative maintenance scheduling helps avoid costly emergency interventions.
Corrosion and Pipe Wall Thickness Check
Image Source: ResearchGate
Detecting corrosion and measuring pipe wall thickness forms a vital component of the plumbing inspection checklist before hydrojetting. Time and environmental factors gradually degrade pipes, creating potential failure points under high-pressure cleaning.
Corrosion and Pipe Wall Thickness Check tools
Professional plumbers rely on specialized equipment to evaluate pipe condition:
- Ultrasonic thickness gages measure wall thickness through non-destructive testing, ideal for assessing corrosion effects on tanks and pipes where access is limited to one side [18]
- 5 MHz dual element transducers specifically detect corrosion in steel substrates [18]
- Low-frequency 2.25 MHz probes effectively measure wall thickness in cast iron, aluminum, and zinc pipes using proprietary algorithms that distinguish back wall reflections from grain noise [18]
- High-resolution precision meters analyze thin materials with minimum measuring ranges of 0.008″ for metals and 0.005″ for plastics [18]
Corrosion and Pipe Wall Thickness Check thresholds
Acceptable pipe wall thickness varies based on material, age, and pressure requirements. Qualified technicians evaluate pipes against established industry thresholds:
- Pipe wall thickness at or below 87.5% of nominal thickness triggers alert status [3]
- Measurements below 75% of nominal thickness indicate replacement necessity [3]
- Pitting corrosion, typically appearing as isolated, scattered pits, requires immediate attention as it progressively deteriorates pipe walls [3]
Corrosion and Pipe Wall Thickness Check safety concerns
Hydrojetting corroded pipes presents substantial risks:
- Applying 3,000 PSI to compromised pipes potentially causes catastrophic failure [19]
- Cast iron pipes, while durable when new, develop thin spots through corrosion that compromise structural integrity [19]
- Graduated pressure approaches starting at 1,000-1,500 PSI help assess pipe tolerance during initial cleaning [19]
- Older homes with clay, cast iron, or galvanized steel pipes require extra caution as these materials become increasingly brittle with age [19]
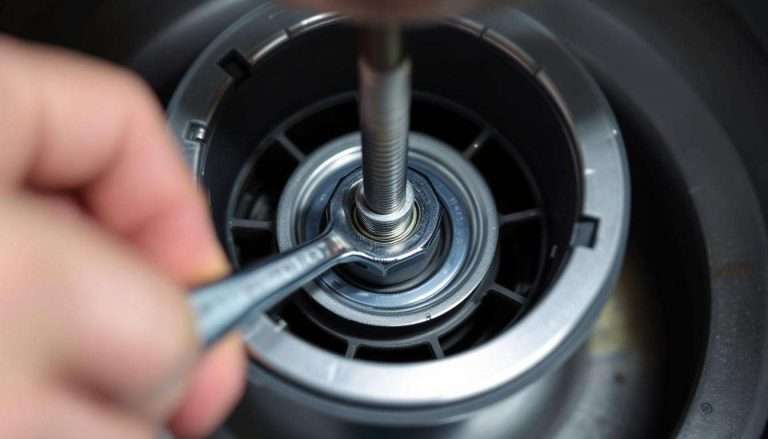
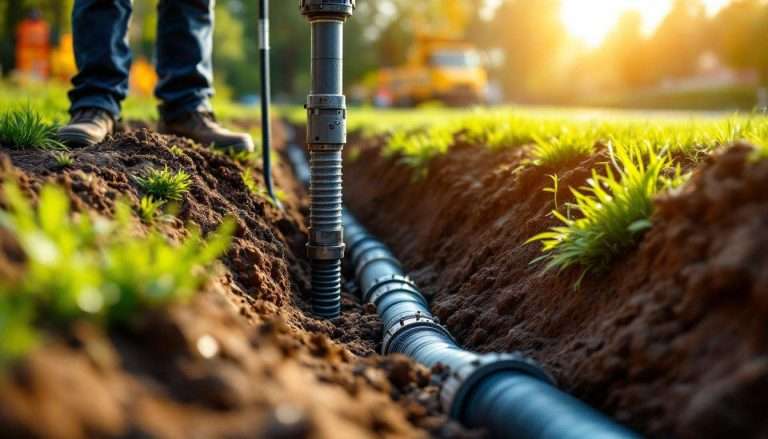
Verification of Cleanout Access Points

Image Source: Intown Plumbing
Locating and confirming viable cleanout access points must precede any hydrojetting operation on your plumbing inspection checklist. These critical access points serve as gateways for equipment entry without requiring pipe excavation.
Verification of Cleanout Access Points locations
Cleanouts typically appear as 3, 4, or 6-inch pipes with white, black, or gold caps [20]. Common locations include:
- Indoor locations: Basements (near foundation walls), crawl spaces, utility rooms, garages, and bathrooms (especially near toilets)
- Outdoor locations: Along the foundation wall, in yards, near sidewalks, or close to the street where your line connects to municipal sewers
Cleanouts resemble T or Y-shaped pipe fittings with threaded plugs [2]. Homes with slab foundations often have cleanouts in bathrooms or utility rooms, identifiable as capped black or white pipes near toilets [2].
Verification of Cleanout Access Points accessibility
Accessible cleanouts must be free from obstructions, easily opened, and structurally sound. Overgrown landscaping or objects near the house may conceal outdoor caps [21]. Buried cleanouts require careful location, often using pipe cameras with locator technology [22].
Verification of Cleanout Access Points importance for jetting
Cleanouts provide direct access to sewer lines, making them essential for hydrojetting operations [23]. They allow technicians to insert jetting nozzles directly into pipes [24], facilitate precise inspection before pressure application [23], and enable targeted cleaning without property disruption [25]. Without proper access points, hydrojetting becomes impossible or requires toilet removal for entry [23].
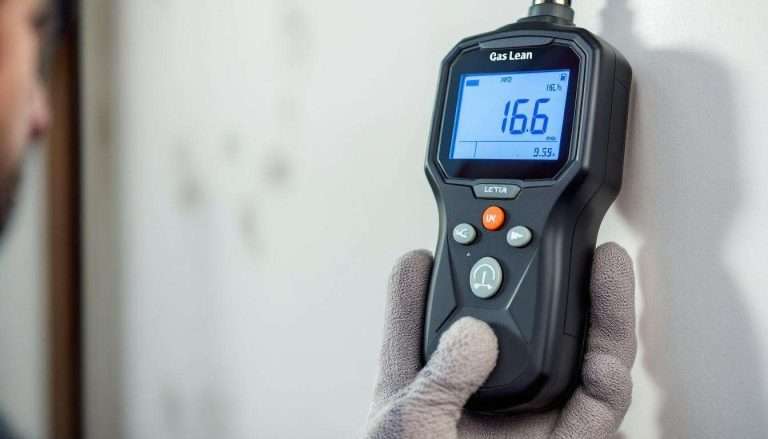
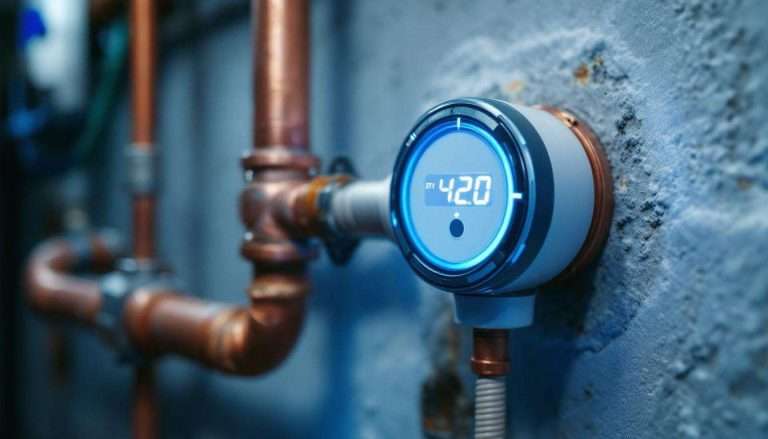
Water Pressure Compatibility Test

Image Source: Constructandcommission.com –
Pressure compatibility testing represents a critical safety measure on the plumbing inspection checklist before approving hydrojetting services. This test determines whether your pipes can withstand the substantial forces involved.
Water Pressure Compatibility Test procedure
The testing process begins with clearly defined parameters based on AWWA standards. Technicians typically apply test pressure at 1.25 times the operating pressure for approximately two hours [26]. Appropriately, testing should start with lower pressures (1,500-2,000 PSI) and gradually increase until effective cleaning is achieved without pipe damage [1]. Throughout this assessment, professionals monitor for excessive vibration, unusual sounds, or pipe movement—all warning signs that pressure must be immediately reduced [27].
Water Pressure Compatibility Test PSI ranges
Different plumbing systems require specific pressure calibrations:
- Residential applications: 1,500-2,500 PSI (103-172 BAR) for 4-6 inch lines [1]
- Commercial systems: 2,500-4,000 PSI (172-276 BAR) for 8-12 inch pipes [1]
- Industrial applications: Often exceeding 4,000 PSI for large-diameter systems [1]
Regardless, the material composition determines safe operating limits. Whereas PVC, ABS, and copper pipes handle pressures up to 4,000 PSI, brittle clay, cast iron, and Orangeburg pipes risk fractures even at lower pressures [28].
Water Pressure Compatibility Test safety implications
Improper pressure selection leads to serious hazards. Excessive force—above 5,000 PSI—can damage pipes, creating expensive leaks or catastrophic ruptures [29]. Nonetheless, safety must extend to operators as well. Protective equipment including full face shields is mandatory for pressures above 2,000 PSI [30]. At 4,000 PSI, water jets can cause severe injuries—potentially tearing an eyeball from its socket upon contact [30].
Inspection of Pipe Joints and Connections

Image Source: NSF
Pipe joints statistically rank as the most vulnerable components in any plumbing system, making their inspection absolutely vital before hydrojetting. Industry data confirms that the majority of pipe failures occur at connection points rather than along straight pipe segments [31].
Inspection of Pipe Joints and Connections weak points
Thorough examination must focus on electrofusion welds, as water industry research indicates approximately 20% of these joints fail prematurely [31]. Correspondingly, joints become susceptible to failure under adverse conditions like ground movement or internal pressure fluctuations. Professional plumbers examine alignment issues, as misaligned connections cannot withstand high-pressure cleaning [32]. A well-made joint exhibits ductility, allowing material to stretch under load without cracking [31].
Inspection of Pipe Joints and Connections sealing issues
Warning signs of imminent joint failure include visible rust or erosion, even minor leaks, unusual sounds during water flow, and color changes around connection points [32]. Improperly compressed gaskets and deteriorating seal materials create vulnerable points that hydrojetting pressure can exploit. Vibration, thermal expansion, and water hammer effects gradually loosen traditional connections over time [33].
Inspection of Pipe Joints and Connections repair needs
Camera inspection remains essential for identifying joint weaknesses before hydrojetting [34]. Plumbers specifically evaluate past repairs, seeking evidence of proper fusion techniques versus temporary patches [31]. Quality control should incorporate strict procedures and non-destructive testing of sample fittings to ensure connections can withstand planned pressure levels [31].
Documentation and Reporting Standards

Image Source: Housecall Pro
Proper documentation serves as the cornerstone of every plumbing inspection checklist, creating an essential record of hydrojetting conditions and outcomes.
Documentation and Reporting Standards format
Standardized documentation typically includes pre-inspection video footage establishing baseline pipe conditions, detailed written reports, and post-jetting visual evidence [6]. Most professionals utilize drainage maintenance reports to document site information, inspection shaft location, cause of blockage, and any identified damage [6]. These reports should include as-constructed drainage layouts and photographic evidence clearly showing conditions before, during, and after the procedure [6].
Documentation and Reporting Standards required details
Complete reports must capture works order information, property details, specific blockage contents, structural concerns, and actions taken [6]. Alongside this information, comprehensive documentation includes timestamps, detailed observations of pipe conditions, and recommended pressure settings for the hydrojetting process [4]. All reports should list schedule of rates, non-scheduled labor costs, and any specialized equipment utilized [6].
Documentation and Reporting Standards for future reference
Professional documentation becomes invaluable henceforth as legal protection against disputes [35]. These records serve as critical references for property maintenance history and support future planning decisions [4]. Proper storage—whether digital or physical—ensures compliance with retention requirements [36]. Above all, detailed reports create verification that hydrojetting was both necessary and performed correctly, with final video footage showing true pipe condition after cleaning [37].
Safety Protocols and PPE Compliance

Image Source: The Pipe Medic
Worker protection constitutes a non-negotiable aspect of the plumbing inspection checklist before hydrojetting operations. Implementing proper safety protocols prevents injuries while ensuring regulatory compliance.
Safety Protocols and PPE Compliance checklist
Complete personal protective equipment for hydrojetting operations must include:
- Safety goggles and full face shield (mandatory for pressures above 2,000 PSI) [38]
- Hearing protection for noise levels exceeding OSHA standards [5]
- Heavy-duty waterproof gloves and protective clothing [30]
- Steel-toe rubber boots with metatarsal protection [7]
- Hard hat with plastic face shield [5]
Equally important, pre-operation safety verification should confirm hose restraints are properly fitted, all high-pressure hoses have been inspected, and safety observers maintain clear sightlines to nozzle operators [39].
Safety Protocols and PPE Compliance training
Only trained and certified personnel should perform hydrojetting operations [40]. First, comprehensive training ensures technicians understand equipment operation, safety protocols, and potential hazards. Subsequently, annual refresher training must be provided to maintain safety awareness [38]. In fact, proper training reduces accident risks while improving operational efficiency through correct techniques [41].
Safety Protocols and PPE Compliance legal requirements
OSHA regulations mandate employer protection of workers from workplace hazards [42]. Hence, businesses failing to supply proper PPE face disciplinary action, fines exceeding $16,000 per violation, and responsibility for workers’ compensation [38]. Most importantly, proper documentation of training, equipment inspections, and incident reports demonstrates compliance while facilitating continuous improvement in safety practices [40].
Verification of Local Plumbing Code Compliance

Image Source: MVP Plumbing
Adhering to local plumbing codes forms a crucial regulatory requirement on any plumbing inspection checklist before hydrojetting operations. These codes establish minimum standards for plumbing system safety and functionality.
Verification of Local Plumbing Code Compliance scope
Local plumbing regulations encompass multiple code systems, including the International Plumbing Code (IPC), Uniform Plumbing Code (UPC), National Standard Plumbing Code (NSPC), and jurisdiction-specific requirements [8]. Primarily, these codes govern material quality, installation methods, and system functionality. Hydrojetting operations must comply with both national standards and local amendments that often contain specific testing requirements for drainage systems [10].
Verification of Local Plumbing Code Compliance inspection points
Key inspection requirements typically include:
- Verification that permits are current and accessible on-site [43]
- Confirmation of pressure testing (5 psi air test for 15 minutes or water test with 10-foot head) [43]
- Proper pipe materials and sizing according to local specifications [10]
- Cleanout accessibility and placement [43]
- Documentation of licensed professional involvement unless homeowner-performed [43]
Verification of Local Plumbing Code Compliance consequences of non-compliance
Failing to meet code requirements can result in substantial penalties, including financial fines exceeding $16,000 per violation [8]. Additionally, non-compliant systems may void insurance coverage for water damage claims [44]. Unlicensed or unpermitted work often triggers inspection failures, construction delays, and mandated system retrofitting [45]. Beyond regulatory consequences, code violations compromise safety with risks of property damage and sewage backups [46].
Conclusion
Thorough inspection of your plumbing system before hydrojetting ultimately saves you from potentially catastrophic damage and expensive repairs. Each of the 13 checklist items works together to ensure both safety and effectiveness when employing this powerful cleaning method. Though hydrojetting effectively clears stubborn clogs and restores proper flow, the extreme pressure applied must be carefully matched to your specific pipe conditions.
First, understand that skipping any inspection step significantly increases risk. Video inspections provide critical baseline information, while material assessment determines whether your pipes can withstand the pressure. Similarly, checking pipe diameter, previous repairs, root intrusion, and buildup severity all factor into making appropriate jetting decisions.
Pipe wall thickness evaluation proves particularly important since corroded or thinned sections might rupture under pressure. Additionally, accessible cleanout points, proper pressure testing, and joint inspection further safeguard against failures. Comprehensive documentation not only protects you legally but also establishes valuable maintenance history for future reference.
Undoubtedly, safety protocols and code compliance remain non-negotiable aspects of professional hydrojetting operations. Qualified technicians wearing proper protective equipment reduce both injury risks and property damage potential.
Rather than viewing these inspection requirements as obstacles, consider them essential safeguards protecting your property investment. When conducted properly, hydrojetting safely restores your plumbing system to optimal function without compromising structural integrity. The time and cost invested in thorough pre-jetting inspection pale compared to expenses resulting from preventable pipe failures. Professional plumbers following this comprehensive checklist help you make informed decisions about whether hydrojetting represents the right solution for your specific plumbing situation.
References
[1] – https://dercsalotech.nl/kennisbank/how-much-pressure-do-you-need-for-a-sewer-jetter/
[2] – https://nodig.com/blog/sewer-line/how-to-find-your-sewer-line-cleanout-location
[3] – https://inspectpipe.com/wp-content/uploads/Article-Defining-Wall-Thickness-Acceptance-Levels-for-Your-In-Service-Piping.pdf
[4] – https://westernrooter.com/the-ultimate-guide-to-hydro-jetting-procedures-for-property-managers/
[5] – https://fsesgsafety.com/Portals/0/pdf/PI170 General Waterblast Safety Manual.pdf
[6] – https://safetyculture.com/library/property-and-facilities-management/department-of-communitieshousing-authority-hydro-jetting-and-camera-drainage-report-maintenance-works-and-service-contract
[7] – https://www.westlake.com/safety_guidelines/PLQ_Safety_Guidelines/Safety/HSP 333.pdf
[8] – https://butlerplumbinginc.com/best-practices-maintaining-commercial-plumbing-efficiency/
[9] – https://www.wpsexpert.com/calculators/how-much-water-can-flow-through-a-pipe-by-size-and-gpm-or-gph/?srsltid=AfmBOoqoxAF3pdu8Z-uvK484XkuNt-RWlzBFZ8VDk-_y_Cwwz4hUpRW8
[10] – https://www.floridabuilding.org/fbc/Commission/FBC_1222/December_2022/Amendment_Update/Plumbing-Fuel_Gas_Local_Amends_Combined_with_detail_2022-04-19-v2.pdf
[11] – https://resources.hy-techroof.com/blog/how-much-water-can-flow-through-a-pipe
[12] – https://spartantool.com/informationcenter/resources/sewer-jetting-pressure-and-flows?srsltid=AfmBOoqRSrdolHuBKJgB3jEpkbQEvXbVSJ_iRhNRXTs1Yls3UfBTKVV-
[13] – https://www.acmeplumbing.com/blog/restoring-pipe-diameter-why-hydro-jetting-reduces-future-clog-risk-long-term/
[14] – https://www.andersonplumbingheatingandair.com/blog/signs-of-aging-pipes/
[15] – https://www.garvinssewerservice.com/drains/hydrojetting/can-hydrojetting-damage-pipes/
[16] – https://stollwerckplumbing.com/hydro-jetting-services/
[17] – https://drain-express.com/when-old-pipes-tell-tales-recognizing-the-signs-your-home-needs-repiping/
[18] – https://www.defelsko.com/product-categories/ultrasonic-wall-thickness
[19] – https://www.newpipesinc.com/is-hydro-jetting-safe-for-old-or-fragile-pipes/
[20] – https://nexgenairandplumbing.com/blog/10-reasons-to-have-a-sewer-line-cleanout-installed/
[21] – https://www.mrrooter.com/about/blog/how-to-find-your-sewer-line/
[22] – https://www.justanswer.com/plumbing/ngeyu-trying-locate-main-sewer-cleanout-outside-home.html
[23] – https://gaeberly.com/hydro-jetting/
[24] – https://empiresewerandwater.com/pages/hydrojetting
[25] – https://readyrooter4you.com/blog/the-important-role-of-cleanouts-and-access-points-in-trenchless-repairs/
[26] – https://www.mcwaneductile.com/blog/how-to-successfully-prepare-and-complete-a-hydrostatic-test/
[27] – https://egyptvalleyparanormalinvestigations.com/water-pressure-requirements-for-effective-hydro-jetting-understanding-psi-levels-and-flow-rates-for-different-pipe-materials/
[28] – https://anchorplumbingservices.com/the-comprehensive-guide-to-hydro-jetting/
[29] – https://cleeservices.com/how-much-psi-is-too-much-understanding-hydro-jetting-pressure-levels/
[30] – https://www.hotjetusa.com/images/safety.pdf
[31] – https://www.impact-solutions.co.uk/pipe-joint-failure/
[32] – https://blog.hb-steel.com/what-are-the-common-failure-modes-in-pipe-connectors
[33] – https://www.ifan-solution.com/info/common-failure-points-in-plumbing-and-how-ppr-103011289.html
[34] – https://txhydrojet.com/blog/can-hydro-jetting-damage-pipes-expert-guide-to-safe-cleaning/
[35] – https://buildops.com/resources/plumbing-work-order/
[36] – https://www.allsourcetxplumbing.com/blog/2024/june/how-to-ensure-accurate-documentation-of-hydrosta/
[37] – https://ajfinspections.com/sewer-scopes-and-hydro-jetting/
[38] – https://www.servicetitan.com/blog/plumbing-ppe
[39] – https://www.wellingtonwater.co.nz/assets/WW-Knowledge-Base-/S-O-Ps/Network-/Drainage-SOPs/Jet-Flusher-Pre-Start-Checklist.pdf
[40] – https://thepipemedic.com/hydro-jetting-made-safe-guidelines-and-regulations/
[41] – https://dercsalotech.nl/kennisbank/what-ppe-is-required-for-high-pressure-water-jetting/
[42] – https://www.sewerinstitute.com/post/guide-to-personal-protective-equipment-ppe
[43] – https://mybuildingpermit.com/sites/default/files/inline-files/IC_Residential_Plumbing-Rough-In_Final.pdf
[44] – https://www.nuflowmidwest.com/how-to-keep-your-propertys-plumbing-system-up-to-code-tips-for-staying-compliant-with-regulations/
[45] – https://mikesplumbingnc.com/the-role-of-plumbers-in-building-codes-and-regulations/
[46] – https://www.williamparrishplumbing.com/blog/2024/may/the-dangers-of-diy-plumbing-mistakes/